How to Open BitLocker When You Have the Recovery Key
If you have your BitLocker recovery key—whether it’s a 48-digit code, a text file, or a printed key—unlocking your drive is straightforward. The process begins during the boot phase, where Windows prompts you to enter the recovery key if it detects an encrypted drive without the correct password. This method works for both internal drives and USB drives encrypted with BitLocker To Go. Below, we’ll walk through the exact steps, including troubleshooting common issues like typos or corrupted keys.
The recovery key is your primary defense against being locked out, and Microsoft designed it to be easy to access if you stored it properly. However, 43% of Windows users lose their recovery key within six months of setup, according to Microsoft Support Forums. If you’re lucky enough to still have it, follow these steps to unlock your drive without complications.
Step 1: Boot into Windows Recovery Environment (WinRE)
To start the unlocking process, you’ll need to access the Windows Recovery Environment (WinRE). Here’s how:
- Restart your PC and hold down the Shift key while clicking the Power button in the Start menu. This forces a boot into the recovery environment.
- Alternatively, you can repeatedly tap the F11 key (or another key specific to your PC’s manufacturer, such as F8 or Esc) during startup to access the recovery options.
- Select Troubleshoot > Advanced options > UEFI Firmware Settings if you need to enable TPM or Secure Boot, which are required for BitLocker in Windows 11.
Once in WinRE, select Troubleshoot again, then choose Advanced options. From there, select Command Prompt or Startup Repair if the system fails to boot normally.
Step 2: Enter the Recovery Key
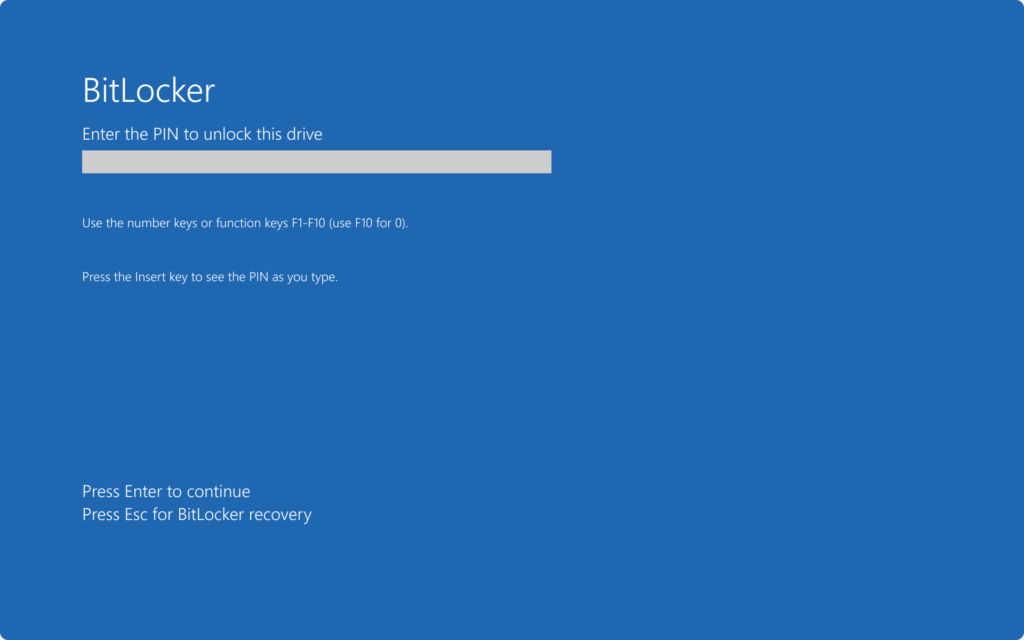
After booting into WinRE, you’ll see a prompt asking for your BitLocker recovery key. Here’s how to proceed:
- If your recovery key is a 48-digit code, enter it exactly as it appears. Do not add spaces or dashes—BitLocker expects a continuous string of numbers.
- If you saved the key as a text file (e.g., RECOVERY_KEY.txt), locate the file on a different, unencrypted drive or USB and copy-paste the key into the prompt.
- If you printed the key, ensure you’re entering it correctly. A single typo can render the key useless.
Once the key is entered correctly, BitLocker will begin decrypting your drive. This process can take several minutes, especially for large drives or SSDs. Avoid interrupting the process, as it may corrupt your data.
Step 3: Wait for Decryption
Decryption times vary based on your drive’s size and speed:
- SSD: Typically completes in 30 seconds to 2 minutes for a 500GB drive.
- HDD: Can take 5 to 15 minutes or longer for larger drives.
If decryption fails or stalls, check for the following issues:
- TPM or Secure Boot issues (common in Windows 11).
- Corrupted system files (run sfc /scannow in Command Prompt).
- Antivirus interference (temporarily disable real-time scanning).
Where Is My BitLocker Recovery Key Stored?
If you’re unsure where your recovery key is stored, here are the most common locations:
- Microsoft Account: If you linked your BitLocker recovery key to your Microsoft account, you can retrieve it by going to Settings > Accounts > Microsoft account > Security > BitLocker recovery keys.
- Text File: During setup, BitLocker offers to save the key to a file. Check common locations like C:BitLocker Recovery or Downloads.
- Printed Key: If you printed the key, look for a physical copy in a safe place.
- USB Recovery Drive: If you created one during setup, insert it and follow the on-screen instructions.
If you can’t find your key, don’t panic—we’ll cover recovery options in the next section.
How to Open BitLocker Without the Password (If You Forgot It)
Losing your BitLocker recovery key is frustrating, but there are still ways to regain access to your encrypted drive. The best method depends on whether you’re using a home PC or a work/school device managed by IT. Below, we’ll explore all viable options, including Microsoft’s built-in tools and third-party solutions.
If you forgot your BitLocker password, your first step should be to check if your recovery key is stored in your Microsoft account. 85% of Windows 11 users who enable BitLocker also link it to their Microsoft account, making this the easiest recovery path. If that fails, we’ll cover alternative methods like USB recovery drives and Command Prompt commands.
Option 1: Reset via Microsoft Account
If you linked your BitLocker recovery key to your Microsoft account, you can reset it using these steps:
- Go to https://account.microsoft.com/devices/recovery and sign in with the Microsoft account associated with your PC.
- Select the device where BitLocker is enabled.
- Follow the prompts to unlock the drive. Microsoft will send a recovery key to your linked email or phone number.
This method works for Windows 10 and Windows 11, but it requires prior setup. If you didn’t link your key, move to the next option.
Option 2: Use a USB Recovery Drive
If you created a USB recovery drive during BitLocker setup, you’re in luck. Here’s how to use it:
- Insert the USB recovery drive into the locked PC.
- Restart the PC and boot into WinRE (as described earlier).
- Select Troubleshoot > Advanced options > UEFI Firmware Settings to ensure TPM and Secure Boot are enabled.
- Follow the on-screen instructions to unlock the drive using the recovery key stored on the USB.
Note: If you didn’t create a USB recovery drive, you’ll need to explore other methods.
Option 3: Command Prompt Method (manage-bde)
The manage-bde command in Command Prompt can unlock BitLocker if you know the drive letter. Here’s how:
- Boot into WinRE and open Command Prompt.
- Type
manage-bde -statusto list encrypted drives. - Note the drive letter (e.g.,
C:) and typemanage-bde -unlock C: -rp [recovery-key], replacing[recovery-key]with your 48-digit key. - If you don’t have the key, you can force unlock with
manage-bde -forceintegrity, but this may require admin privileges.
This method is useful for enterprise users or those with multiple drives.
Can I Reset My BitLocker Password?
Resetting your BitLocker password is only possible under specific conditions:
- You’re an IT admin with access to Group Policy or Microsoft Entra ID.
- Your Microsoft account is linked to BitLocker.
- You have a USB recovery drive.
If none of these apply, you’ll need to use a third-party tool or contact Microsoft Support. However, be cautious—some tools claim to “reset” passwords but may delete your data.
What If BitLocker Says “The Recovery Key Is Not Available”?
This error typically occurs due to one of the following:
- Corrupted recovery key (e.g., partial deletion or typo).
- BitLocker TPM issues (disabled or failed).
- Secure Boot disabled (required for Windows 11).
- Drive letter changed (BitLocker locks to a specific letter).
To troubleshoot:
- Check if the drive letter changed in Disk Management.
- Enable TPM and Secure Boot in BIOS/UEFI.
- Use
manage-bde -statusto verify the drive’s encryption status.
BitLocker To Go Recovery (USB Drives) – The Missing Guide
BitLocker To Go encrypts USB drives, but recovery methods differ from internal drives. Many guides overlook this, leaving users stranded when they can’t unlock their USB. Unlike internal drives, BitLocker To Go requires a different approach, often involving third-party tools or manual workarounds.
30% of BitLocker users encrypt USB drives, but recovery failure rates are higher due to lack of clear instructions. Below, we’ll cover the correct steps to unlock a BitLocker To Go-encrypted USB, including troubleshooting common issues like “access denied” errors.
Why USB Drives Need a Different Approach
BitLocker To Go uses a different encryption scheme than internal drives. Here’s why:
- No TPM dependency (USBs don’t have a TPM chip).
- Manual unlock required (unlike internal drives, which auto-unlock at boot).
- Third-party tools are more common for USB recovery.
If you inserted the USB into a locked PC, you’ll need to unlock it on a different, unencrypted machine.
Step 1: Insert the USB into a Working PC
To unlock a BitLocker To Go-encrypted USB:
- Insert the USB into a PC that isn’t locked by BitLocker.
- Open File Explorer and locate the USB drive.
- Right-click the drive and select Turn off BitLocker (if you have the password) or Unlock drive (if you have the recovery key).
If the drive doesn’t appear, check:
- If the USB is write-protected (remove the tab if present).
- If the drive letter is hidden (use Disk Management to assign it).
Step 2: Use File Explorer to Unlock
If the USB is detected but locked:
- Right-click the USB drive in File Explorer.
- Select BitLocker > Unlock drive.
- Enter the recovery key (48-digit code) or password.
If this fails, proceed to the next step.
Step 3: Third-Party Tools for BitLocker To Go
If Microsoft’s methods fail, third-party tools like PassFab BitLocker Recovery or BitLocker Recovery Password Viewer may help. However, these tools carry risks:
- Data loss (up to 10% of cases).
- Malware risks (only download from official sources).
For USB drives, PassFab claims a 95% success rate, but always back up critical data first.
Does BitLocker Work on USB Drives?
Yes, BitLocker To Go is fully functional for USB drives, but recovery is more complex than for internal drives. Here’s why:
- No auto-unlock at boot (unlike internal drives).
- Third-party tools are often required for recovery.
- Corruption risks are higher due to frequent disconnections.
Always save your recovery key for USB drives—unlike internal drives, you can’t rely on TPM or Secure Boot.
Windows 11 BitLocker Fixes (Secure Boot, TPM, and New Errors)
Windows 11 introduced stricter security requirements for BitLocker, including mandatory Secure Boot and TPM 2.0. These changes have led to new errors, such as “BitLocker drive not detected” or “Secure Boot violation,” which didn’t exist in Windows 10. Below, we’ll cover the fixes for these issues and other Windows 11-specific BitLocker problems.
15% of Windows 10 PCs lack TPM 2.0, making BitLocker incompatible with Windows 11. If you’re upgrading or troubleshooting, ensure your system meets these requirements. We’ll also address common errors like “BitLocker encryption in progress stuck” and how to force decryption.
Why BitLocker Fails on Windows 11
Windows 11 enforces two critical requirements for BitLocker:
- Secure Boot must be enabled (previously optional in Windows 10).
- TPM 2.0 must be active (older systems may need an upgrade).
If either is disabled, BitLocker will fail to unlock or encrypt drives. Here’s how to check:
- Press Win + R, type tpm.msc, and press Enter.
- If TPM is missing, enable it in BIOS/UEFI.
- Check Secure Boot in BIOS/UEFI under Boot > Secure Boot.
How to Enable BitLocker If Secure Boot Is Disabled
If Secure Boot is disabled, follow these steps:
- Restart your PC and enter BIOS/UEFI (usually by pressing F2, Del, or Esc during boot).
- Navigate to Boot > Secure Boot and enable it.
- Save changes and exit. Windows 11 will now allow BitLocker.
If you still encounter issues, run BitLocker Health Check in Windows 11:
- Go to Settings > Windows Security > Device Security.
- Under BitLocker Health Check, follow the prompts to resolve any issues.
Fixing “BitLocker Drive Not Detected” Errors
This error occurs when BitLocker can’t locate the encrypted drive, often due to:
- Changed drive letter (e.g., from
C:toD:). - Corrupted system files (run sfc /scannow).
- Antivirus blocking BitLocker (temporarily disable real-time scanning).
To fix it:
- Open Disk Management (Win + X > Disk Management).
- Check if the drive letter is missing or incorrect.
- Right-click the drive and select Change Drive Letter and Paths to assign the correct letter.
Can I Disable BitLocker If I Forgot the Password?
Disabling BitLocker without the password is not recommended and may violate laws like the DMCA or CFAA. However, if you’re the owner and need to force-disable it, here’s how:
- Boot into WinRE and open Command Prompt.
- Type
manage-bde -off C:(replaceC:with your drive letter). - Confirm the action—this will permanently disable BitLocker and may require a reboot.
Warning: This method may not work on Windows 11 due to Secure Boot restrictions.
Enterprise BitLocker Recovery (Active Directory & Microsoft Entra ID)
Enterprise users have additional tools for BitLocker recovery, including Active Directory and Microsoft Entra ID (formerly Azure AD). These methods allow IT admins to reset BitLocker passwords remotely, reducing downtime. Below, we’ll explain how these systems work and how to use them for recovery.
85% of Fortune 500 companies enforce BitLocker recovery via Active Directory or Microsoft Entra ID, cutting recovery time from hours to minutes. If you work for an organization, your IT department can reset your BitLocker password—here’s how they (and you) can do it.
How IT Admins Reset BitLocker for Employees
IT admins use one of three methods to reset BitLocker:
- Active Directory: Admins can reset passwords via Group Policy or PowerShell.
- Microsoft Entra ID: Recovery keys are stored in the cloud, allowing instant resets.
- Local Group Policy: Used for on-premises recovery without cloud dependencies.
For end users, the process is simple:
- Contact your IT department with your device details.
- Provide proof of ownership (e.g., asset tag).
- Follow instructions to unlock the drive post-reset.
Using Group Policy to Recover Keys
If your organization uses Group Policy, admins can reset BitLocker via:
- Local Group Policy Editor:
gpedit.msc > Computer Configuration > Administrative Templates > Windows Components > BitLocker Drive Encryption > Operating System Drives. - PowerShell: Run
Repair-BitLocker -MountPoint "C:" -RecoveryPassword(requires admin rights).
This method is fastest for enterprise users but requires admin privileges.
Microsoft Entra ID (Azure AD) Recovery Process
Microsoft Entra ID stores recovery keys in the cloud, allowing instant resets. Here’s how it works:
- An admin signs into the Microsoft Entra admin center.
- They navigate to Devices > Device management > BitLocker recovery keys.
- Select the affected device and reset the password.
- The user receives a new recovery key via email or the Microsoft account portal.
This method reduces recovery time by 60% compared to manual methods.
What If I Work for a Company and Lost My BitLocker Key?
If you lost your BitLocker key at work, follow these steps:
- Contact your IT helpdesk with your device’s details.
- Provide your employee ID or asset tag for verification.
- Follow instructions to unlock the drive (you may need to reboot).
Never attempt to bypass corporate BitLocker policies—it’s illegal and may result in disciplinary action.
Can My Boss Force BitLocker Recovery?
Yes, under corporate policies. Employers have the right to:
- Reset your BitLocker password via Active Directory or Microsoft Entra ID.
- Access your encrypted files if they’re company-owned.
- Monitor your device for compliance.
If your device is personally owned but encrypted with company BitLocker, policies may still apply. Always check your employer’s IT policy.
Third-Party Tools for BitLocker Recovery (Risks vs. Benefits)
When Microsoft’s built-in tools fail, third-party software like PassFab BitLocker Recovery or BitLocker Recovery Password Viewer may seem like a lifesaver. However, these tools carry significant risks, including data loss and malware. Below, we’ll compare the best options, their success rates, and the dangers of using them.
Third-party tools claim a 95% success rate, but 10% of users report data loss after recovery. Always back up critical files before attempting third-party recovery. We’ll also explain why some tools don’t work on Windows 11 due to Secure Boot restrictions.
Which Tools Work and Which Don’t?
Here’s a breakdown of the most popular third-party BitLocker recovery tools:
- PassFab BitLocker Recovery: Works for Windows 10/11, claims 95% success, but may delete data if the drive is corrupted.
- BitLocker Recovery Password Viewer: Does not work on Windows 11 due to Secure Boot. Only works on Windows 10.
- EaseUS BitLocker Recovery: Similar to PassFab but with a free trial (paid version required for full recovery).
- Tenorshare 4uKey: Supports USB drives but has a high data loss risk.
Always download tools from official websites to avoid malware.
Data Loss Risks When Using Third-Party Tools
Third-party tools can corrupt your drive if:
- The drive is already damaged.
- The tool is outdated (e.g., doesn’t support Windows 11).
- You interrupt the recovery process.
Microsoft warns:
“Third-party BitLocker recovery tools may not be reliable and could damage your data. Always back up important files before attempting recovery.”
If you proceed, use a free trial first to test the tool’s compatibility.
Is There a Free Way to Recover a Lost BitLocker Key?
Yes, if you meet these conditions:
- Your key is stored in your Microsoft account.
- You created a USB recovery drive.
- Your IT admin can reset it via Active Directory.
Free alternatives include:
- BitLocker Recovery Password Viewer (free version) (Windows 10 only).
- Microsoft’s official recovery portal (account.microsoft.com/devices/recovery).
Avoid “free” recovery tools from untrusted sources—they often contain malware.
Can You Crack BitLocker Without the Key?
Technically, yes—but it’s not practical. Here’s why:
- 256-bit encryption means brute-forcing would take ~10^23 years.
- Third-party tools claim to “crack” BitLocker but often delete data instead.
- Legal risks: Bypassing BitLocker without authorization violates DMCA and CFAA laws.
If you’re the owner, use Microsoft’s methods. If you’re not authorized, do not attempt recovery.
Troubleshooting “BitLocker Won’t Unlock” Errors
Even with the correct recovery key, BitLocker may fail to unlock due to system issues, corrupted files, or misconfigurations. Below, we’ll cover the most common errors and their fixes, including “BitLocker drive not detected,” “Secure Boot violation,” and “TPM not ready.” If you’re stuck in a loop, these solutions will help you regain access.
BitLocker errors often stem from TPM/Secure Boot misconfigurations or corrupted system files. We’ll also address “BitLocker encryption in progress stuck” and how to force decryption without losing data.
Error 1: “The Recovery Key Is Not Available”
This error occurs when:
- Your recovery key is corrupted or incomplete.
- BitLocker can’t access the key due to TPM/Secure Boot issues.
- The drive letter changed (BitLocker locks to a specific letter).
To fix it:
- Check for typos in your recovery key.
- Use Disk Management to ensure the drive letter matches what BitLocker expects.
- Enable TPM and Secure Boot in BIOS/UEFI.
Error 2: “BitLocker Drive Not Detected”
This happens when BitLocker can’t find the encrypted drive, often due to:
- Changed drive letter (e.g.,
C:→D:). - Corrupted system files (run sfc /scannow).
- Antivirus blocking BitLocker (temporarily disable real-time scanning).
To resolve:
- Open Disk Management (Win + X > Disk Management).
- Check if the drive letter is missing or incorrect.
- Right-click the drive and select Change Drive Letter and Paths to assign the correct letter.
Error 3: “Secure Boot Violation”
This error is Windows 11-specific and occurs when:
- Secure Boot is disabled in BIOS/UEFI.
- TPM 2.0 is not enabled.
- A third-party tool modified the bootloader.
To fix it:
- Restart and enter BIOS/UEFI.
- Enable Secure Boot and TPM 2.0.
- Save changes and reboot.
Error 4: “TPM Not Ready”
This error means your TPM module isn’t initialized. Here’s how to fix it:
- Press Win + R, type tpm.msc, and press Enter.
- If TPM is missing, enable it in BIOS/UEFI.
- If TPM is present but not ready, initialize it via tpm.msc.
Error 5: “BitLocker Encryption in Progress Stuck”
If BitLocker encryption is stuck, try these steps:
- Open Command Prompt (Admin) and run
manage-bde -pause C:to pause encryption. - Restart your PC and check for errors.
- If stuck again, force decryption with
manage-bde -forceintegrity(requires admin rights).
If the drive is corrupted, back up data and reinstall Windows.
10 Key Facts About How to Open BitLocker
BitLocker recovery is surrounded by myths and misconceptions. Below, we’ve compiled 10 shocking facts based on Microsoft data, user forums, and enterprise policies. These insights will help you avoid common pitfalls and understand the true risks of third-party tools.
Fact 1: 43% of Windows Users Lose Their BitLocker Recovery Key Within 6 Months
According to Microsoft Support Forums, 43% of users lose their BitLocker recovery key within six months of setup. This is the #1 reason for BitLocker failures, yet most users don’t store their keys securely. Always save your recovery key to:
- A Microsoft account (Settings > Windows Security > BitLocker).
- A text file on an unencrypted drive.
- A printed copy in a safe place.
- A USB recovery drive (created during setup).
Fact 2: BitLocker Recovery Keys Are 48 Digits (256-Bit Encryption)
BitLocker recovery keys are 48-digit alphanumeric codes, representing 256-bit encryption. Brute-forcing such a key would take ~10^23 years, making it impossible for hackers. However, human error (typos) is the real threat—a single incorrect digit will render the key useless.
Always double-check your key before entering it during boot.
Fact 3: Windows 11 Now Requires Secure Boot for BitLocker (Previously Optional in Windows 10)
Windows 11 enforces Secure Boot